Diastema closure with composite: a step-by-step clinical case with Filtek Easy Match
Diastemas in the anterior region can have a significant impact on the aesthetics of the smile. Closing them with direct composite restorations makes it possible to modify tooth shape and proportions without necessarily resorting to more invasive treatments, but it requires careful planning to achieve a balanced, natural-looking result.
In this article, we analyse the clinical case carried out by Dr Marcin Krupinski, a clinician specialising in modern endodontic and aesthetic treatments, Key Opinion Leader for Solventum and certified trainer for Style Italiano Group. The case shows the treatment of a patient with multiple diastemas between the upper incisors using a no-prep approach and Solventum Filtek Easy Match in the shade Bright as the only composite shade.
The aim of the treatment was to close the spaces while maintaining harmonious tooth proportions and a natural appearance, simplifying shade selection at the same time and paying particular attention to anatomy, finishing and polishing of the restorations.
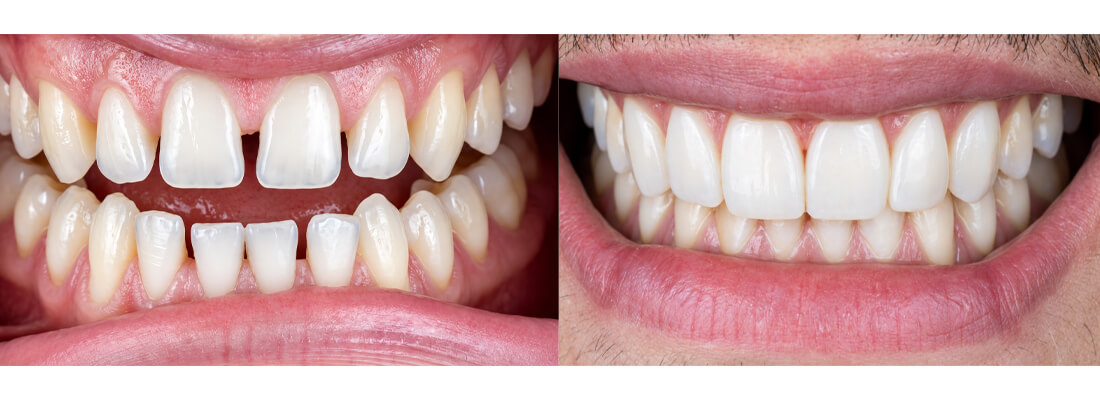
Aesthetic diastema closure with composite
Restorative treatment of diastemas is not simply a matter of filling the space between two teeth. Achieving proper aesthetic integration requires assessing the smile as a whole and controlling factors such as the midline, symmetry, tooth proportions and the relationship between the restorations and the gingival tissues.
In addition, the selection and placement of the composite must allow the material to blend visually with the natural enamel, especially in the proximal areas, where translucency and opacity can considerably alter how the final result is perceived.
What are the challenges of diastema closure?
One of the main challenges is ensuring that the added volume needed to close the spaces does not negatively affect the proportions of the teeth.
When there are several diastemas, as in this case, it is particularly important to distribute the spaces correctly to avoid teeth that are excessively wide or asymmetrical. Prior planning makes it possible to establish the shape the incisors will have once treatment is complete and to maintain a balanced relationship between them.
Another key aspect is the optical integration of the composite. In the proximal areas, it is important to avoid both an overly translucent result, which could create a greyish effect, and an overly opaque appearance that makes the restoration more noticeable.
The restorative technique must also allow the material to adapt properly and make it possible to control the proximal anatomy, the buccal surface and the incisal edges.
Restorations with a single composite shade
In this case, the clinician chose to use only the Bright shade of the universal composite Filtek Easy Match.
This approach simplifies shade selection by working with a single shade throughout the different stages of the restoration. As can be seen in the clinical case, the optical properties of the composite helped achieve natural integration with the tooth tissue once treatment was complete.
However, the aesthetic outcome does not depend solely on the shade chosen. Careful planning of the shape, reconstruction of the tooth surfaces and an appropriate finishing and polishing sequence are also essential for the restorations to blend into the smile.
Clinical case: Closure of multiple diastemas with Filtek Easy Match
The patient attended the clinic mainly concerned about the spaces between the upper incisors and wishing to improve the appearance of their smile.
A direct, no-prep restorative technique was chosen for this case. Based on prior planning, the incisors were gradually built up using 3M Filtek Easy Match Bright, followed by a finishing and polishing sequence with the Sof-Lex system.
Initial situation and planning
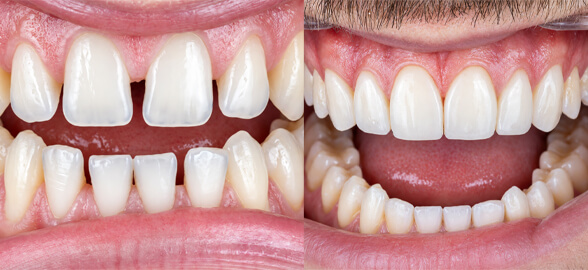
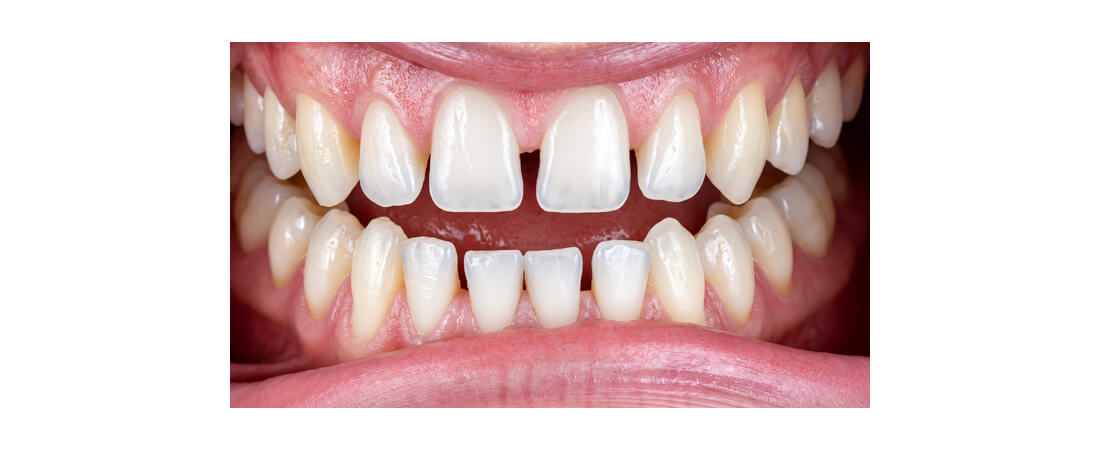
The initial situation showed multiple diastemas in the upper anterior region.
Before starting the restorative procedure, it was necessary to assess how to distribute these spaces so that the teeth would have suitable proportions after treatment.
Planning made it possible to define the new shape of the incisors in advance and to establish a reference for maintaining symmetry, incisal edges and the occlusal relationship during the build-up.
Enamel preparation
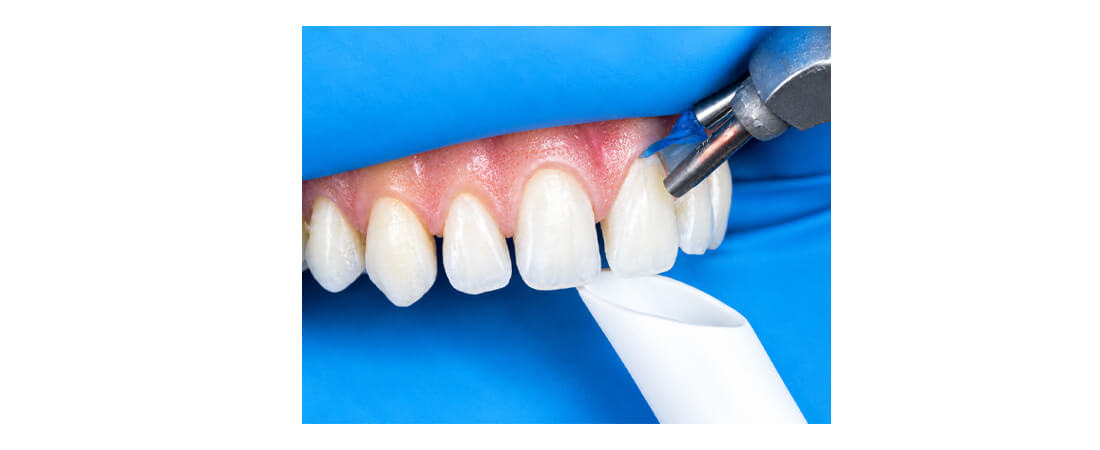
The treatment followed a no-prep approach, so no conventional tooth preparation was required.
The enamel surface was sandblasted and then etched with phosphoric acid before proceeding with the adhesive procedure.
In this way, the restoration could be carried out while preserving the existing tooth structure and adding the composite needed to gradually modify the anatomy of the incisors.
Creating the silicone index
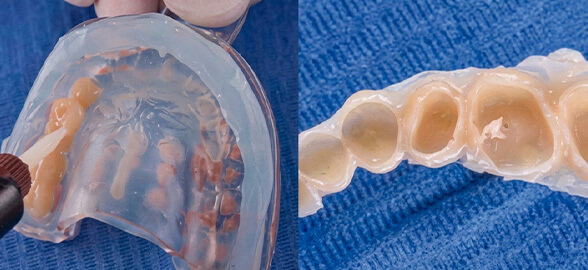
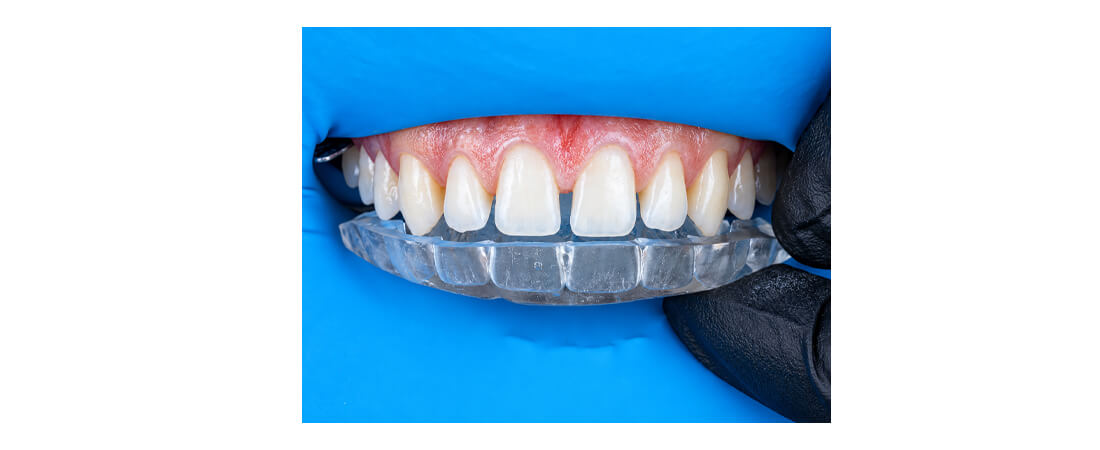
To reproduce the planned shape, a silicone index taken from the wax-up was used.
The index was trimmed to copy only the incisal portion. This guide made it easy to transfer the information established during planning to the mouth, particularly that relating to symmetry and occlusion.
This gave the clinician a reference for creating the new incisal edges and then moving on to the remaining tooth surfaces.
Building up the incisal edges
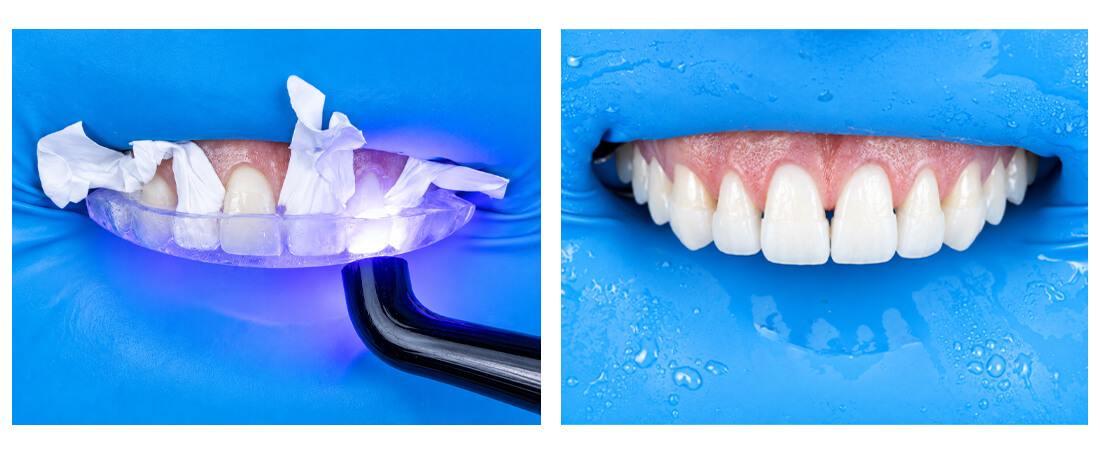
The Filtek Easy Match composite was used pre-warmed and placed directly inside the silicone index.
The index was then positioned over the teeth and the composite was light-cured for 10 seconds per increment.
Once the guide was removed, the incisal edges and occlusal reference previously defined in the wax-up had been transferred to the teeth, creating the base on which to continue the restoration.
Closing the proximal spaces
Once the incisal edges had been created, the remaining areas were built up.
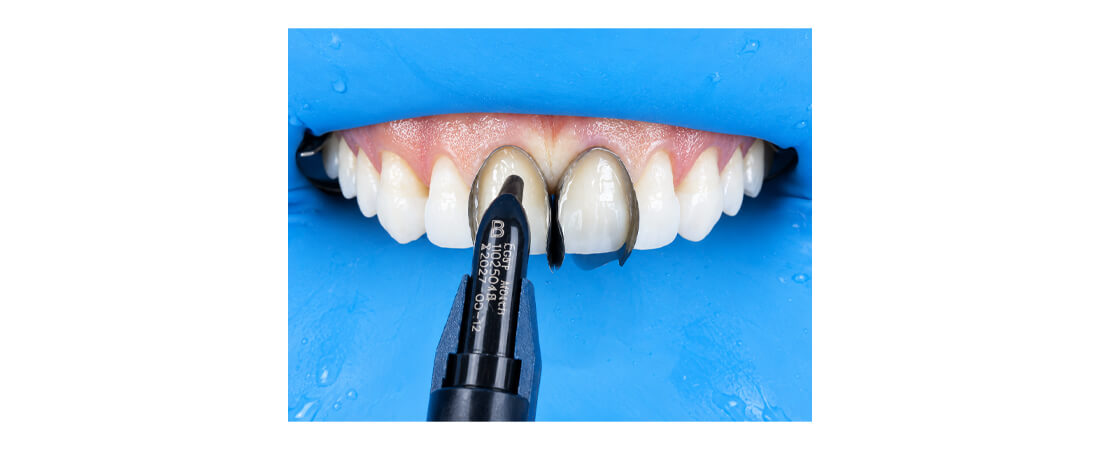
To do this, a Unica anterior matrix was placed, the adhesive procedure was repeated and Filtek Easy Match Bright was applied again to fill the buccal and proximal surfaces.
This stage made it possible to gradually close the diastemas and complete the volume of the incisors following the anatomy planned beforehand.
Controlling these surfaces is particularly important, as their shape determines both the final appearance of the teeth and their relationship with the gingival tissues and adjacent teeth.
Finishing the restorations
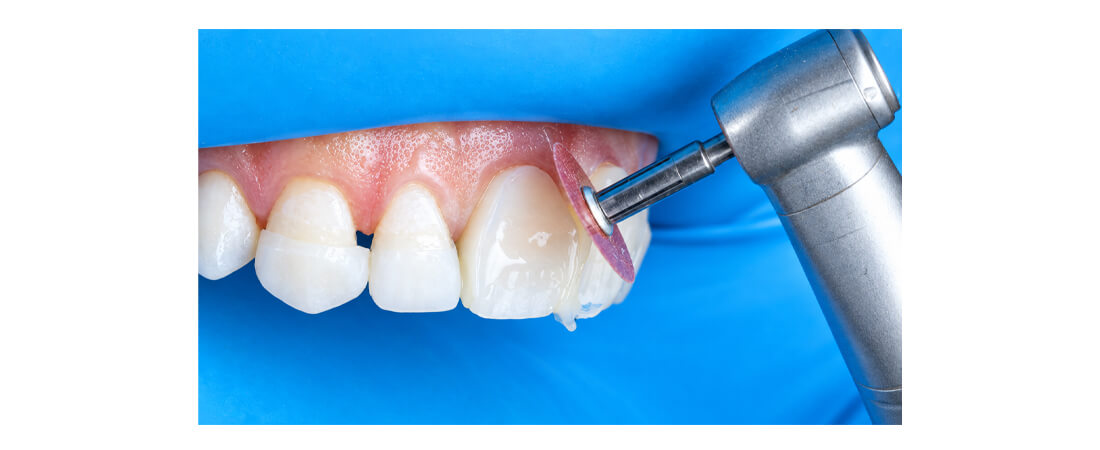
After the composite had been placed, the finishing stage began.
First, excess material was removed and initial contouring was carried out using Sof-Lex finishing and polishing discs.
This step made it possible to refine the shape of the restorations and prepare the surface for polishing. Defining the anatomy is especially important in the anterior region, as the shape and texture of the surfaces directly influence how light is reflected and, therefore, how the teeth are perceived aesthetically.
Pre-polishing and high-gloss polishing
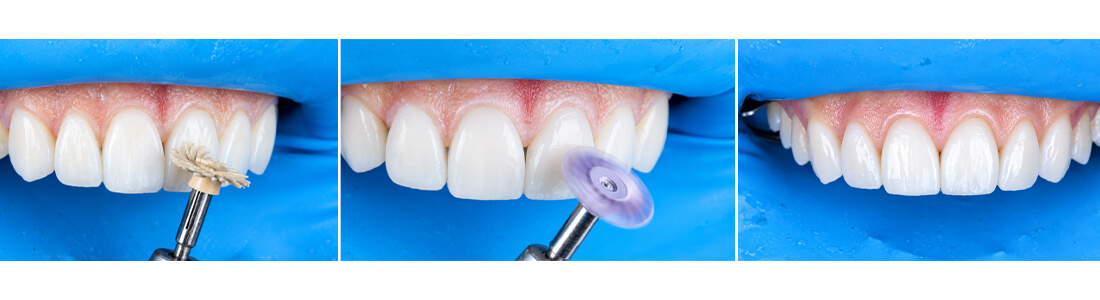
Once contouring was complete, the Sof-Lex pre-polishing spiral was used to gradually smooth the composite surface.
The final step was then carried out with the Sof-Lex diamond polishing spiral, achieving a high-gloss final surface.
This finishing and polishing sequence made it possible to refine the surface texture of the restorations and help them blend visually with the natural teeth.
Result after four weeks
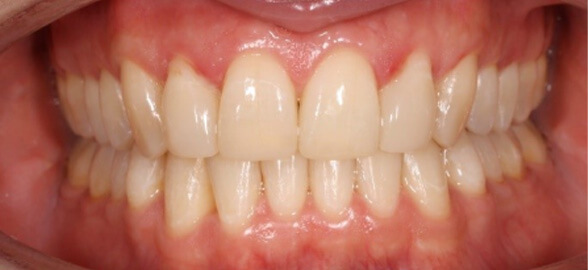
Immediately after polishing, the closure of the diastemas and the new anatomy of the upper incisors could already be seen.
The outcome was reassessed four weeks after treatment. At that point, the restorations showed natural colour integration with the teeth and the gingival margins remained healthy.
The final result achieved the patient's goal: improving the aesthetics of the smile by closing the multiple diastemas while maintaining a natural appearance.
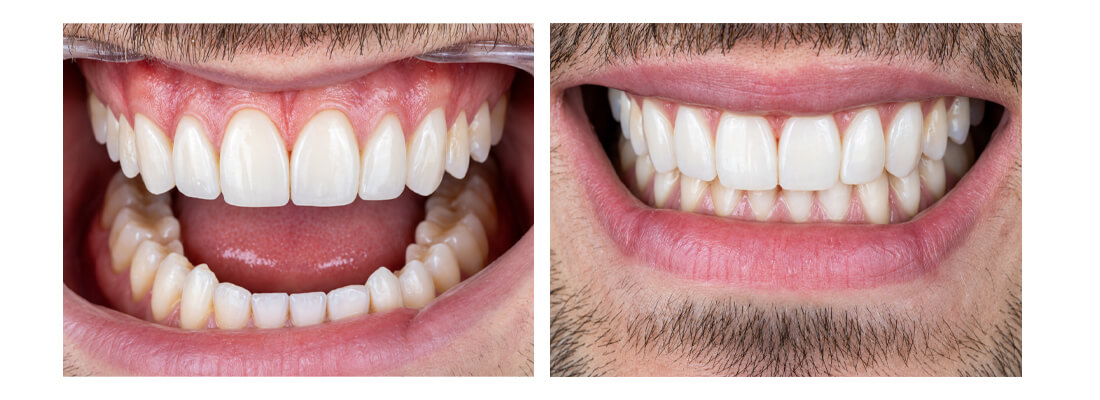
Diastema closure with composite can deliver very natural results when careful planning, good control of tooth proportions and a precise restorative technique are combined. In this case, using Filtek Easy Match made it possible to work with a single composite shade and simplify the shade selection stage.
In addition, the finishing and polishing sequence with Sof-Lex was key to achieving a smooth, glossy surface that blends well with the natural enamel. The result observed at four weeks highlights the importance of attending not only to closing the spaces, but also to the shape, texture and final integration of the restorations.
We hope you have found this post useful. To stay up to date, follow us on social media, where we share more articles, useful information, offers and promotions from the dental sector. We look forward to seeing you there!