Choosing impression materials for your dental clinic
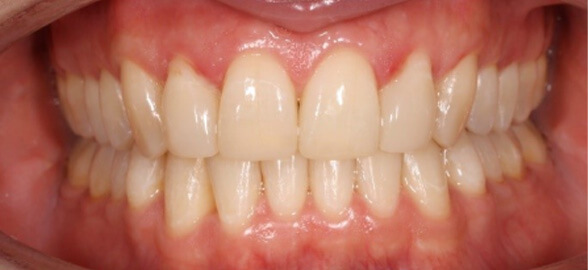
When it comes to taking dental impressions, there are a lot of materials to choose from and at Dentaltix, we want you to get to know the products that we offer on our online platform all of which are carefully handpicked for you to use in your dental clinic. A dental impression is one of the most useful tools that exist in dental clinics to be able to work on precise mouth replicas. It provides a comparative dental reproduction that enables you to work on an exact mold of the patient's oral cavity. When taking dental impressions, make use of impression trays (filled with alginate or sillicone). In this way a negative is taken from the mouth for analysis. Then, to obtain the positive, proceed to empty the impression. Take a look at our list that gives you all the essential products that you will need in your clinic when you come to to take a dental impression.
What do you need to take a dental impression?
Here we provide you with all the products required for taking dental impressions, which you will find at Dentaltix.

- Alginate spatula: At Dentaltix we offer you Medicaline nylon spatulas which are specially designed to mix alginates for dental impressions. These spatulas have an ergonomic handle for greater comfort upon use.
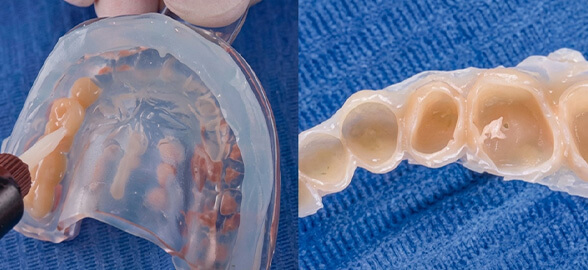
- Alginate: Usually alginate or impression silicone is the material used. However, alginate is more commonly used for two main reasons: silicone tends to be more expensive and for recording soft tissues, such as gum, it is not as effective given that it creates greater pressure due to being a harder paste. The alginate goes through a gelation chemical reaction, from a sun phase to a gel phase; more technically known as irreversible hydrocolloid. We suggest the Cavex CA37 Alginate which is of high precision, has a good working time and achieves a precise reproduction.

- Impression tray : These can be plastic, metal, disposable and individual. We recommend the perforated plastic DuraLock Plus impression tray, with numbering for different mouth sizes and colour coded by Orth Technology.

How to take a dental impression:
Some advice from Dentaltix on how to take a correct dental impression to offer your patients the best service at your dental clinic.
- Take the suitable measurements to create a correct mixing base. 2 measuring spoons of alginate and 2 of water are recommended for the upper jaw. 1.5 of alginate and 1.5 of water for the lower jaw.
- Firstly, add the alginate to the cup and then the water. Remove the mixture, plastering the paste to the walls in a way which ensures there are no remaining lumps of air bubbles.
- The impression tray must be chosen according to the patient’s measurements (the impression tray must exceed the last molar by 1cm and all teeth must be completely covered). The alginate and water mixture created will be poured into the impression tray.
- Wait until the mixture sets, so you should take into account the water temperature (note that the mixture takes longer to set with cold water). Nowadays, a lot of alginates change colour when they set, which are known as chromogenic alginates and makes managing them a lot easier.
- The tray is placed in the patient’s mouth, sitting in a comfortable position for impression taking, trying to avoid the emetic reflex and the possibility of choking, and it is massaged gently to try to achieve a the most exact replica of the oral cavity possible. It is recommended to take the impression of the lower jaw first, and then the upper jaw.
- Once the alginate has set, carefully remove the tray and ensure that it is completely dry – it is better not to rush, as if it stays in a liquid state the remains will spill. Disinfect the impression before emptying it (it is recommended to apply a tension reducer to prevent possible pores from appearing in the alginate).
What do you need to empty a dental impression?
Here we have the necessary products for emptying dental impressions that you will find at Dentaltix


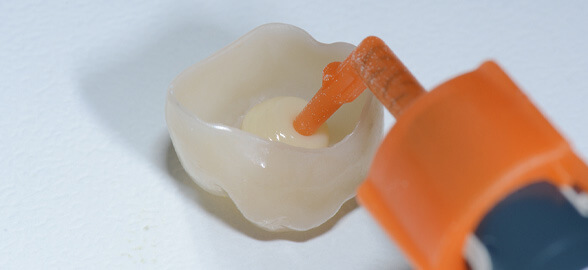
- Gypsum cup: flexible and suitable for going on to make mixtures. Available in sizes small, large and flexible. Suitable for alginate and plaster.
- Plaster vibrator: vibrators are a fundamental tool when it comes to making mixtures for dental treatments in order to avoid the possible appearance of air bubbles. We offer the large rectangular plaster vibrator from Technoflux, a newly-designed machine that has an adjustable and unlimited vibration amplitude. It removes bubbles from the moulds, leaving them homogeneous.
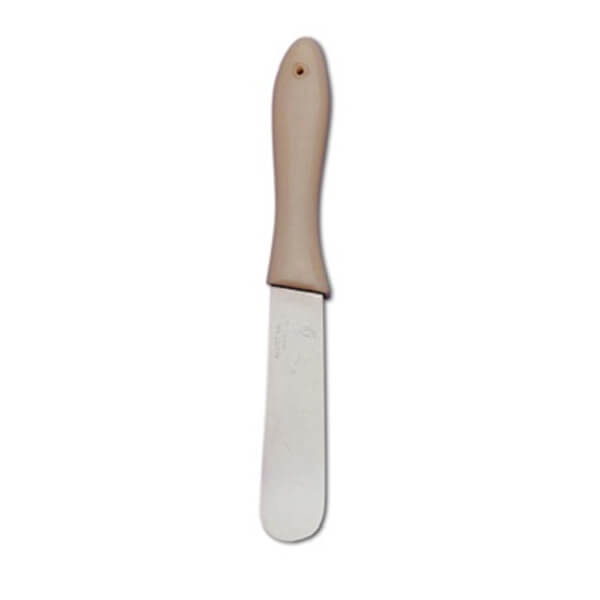
- Wide-blade spatula for gypsum: the gypsum or dental plaster spatula should have a wider blade to facilitate movement when mixing. At Dentaltix we offer Bader’s plaster spatula with a wooden handle, making it more aesthetic and comfortable.
- Plaster: mixing it with water creates hydration, and its progressive loss of solubility thus produces an exothermic reaction.. THere is a wide variety of plasters. We also have Kerr’s Snow White Plaster, a fast-setting plaster. It is available in light shades for easy reading and is aesthetic.
How to empty a dental impression:
- Firstly add the water and then the plaster in powder form until you get a creamy consistency. If you don’t use the exact proportions you risk creating a break due to fragility despite having a similar appearance to the correct mixture.
- The impression should be cleaned with running water, and dried with pressurised air.
- Add the plaster to the impression on the vibrator, always avoiding the appearance of pores. Once the impression is full, it is advised that you fill it a little more to be able to remove it well.
- Once the plaster has dried, we have an alginate model, which must be placed in a humid area in to complete the emptying.
As mentioned previously, dental impressions are really useful for dentistry, but they must be made in the correct way in order to avoid possible failures in future work to be done. On our webpage you will be able to find these products for dental impressions, and much more. Take a look!